GForge AS provides support for Visual Studio 2010
Microsoft has just released Visual Studio 2010, which includes .NET Framework 4.0. GForge concurrently launched its plugin for the new Visual Studio edition. The plugin seamlessly integrates to the VS IDE, allowing the developer quick and convenient access to trackers and documents on the GForge AS server.
How do you install the plugin?
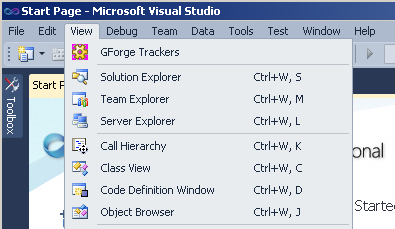
The plugin installs like any regular windows application, it provides an installer included in the executable file. Once the plugin is installed, you can access it on the “View” menu item in Visual Studio 2010.
Clicking on “GForge Trackers” brings the dialog box. The first time you launch it, you must enter the serial number for the plugin to validate, and set the server domain name. The username and password are your regular credentials you use to access the GForge AS Web frontend. For improved security, you can set it to use SSL (this requires SSL to be configured on the server).
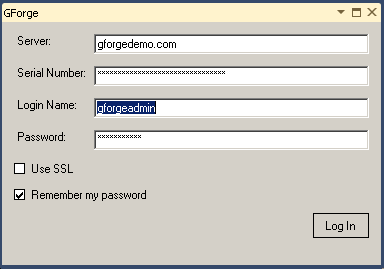
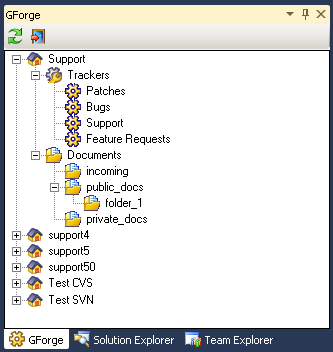
After logging in successfully, the main panel opens. You can set it to be a floating panel or hook it to a Visual Studio IDE container. It displays a tree view of the projects you have access to, with their corresponding trackers and document folders.
The Tracker panel:
This is where most of the developer’s activity takes place. Selecting for Instance the “Support” tracker, opens the panel displayed below. By default it will show all the tracker items:
However, for convenience you may need to filter the tracker items shown by certain criteria. For instance, if you want only the open items assigned to you:
In case you need more complex filters, GForge provides the “saved queries” feature, which is also present in the Visual Studio plugin. You can use any saved query from the GForge server for the current tracker. Just select the query from the drop panel and the items list will refresh automatically:
The same screen in GForge AS web interface:
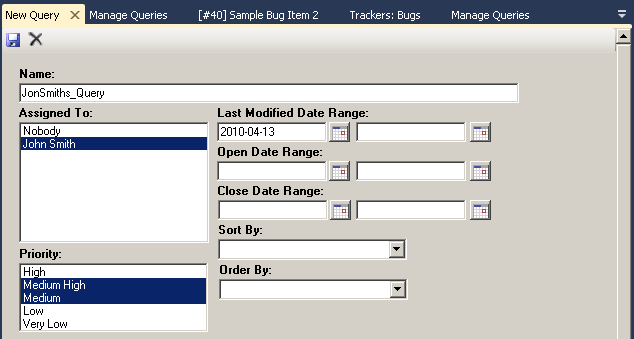
You can create (or edit) your own query directly from your desktop using the plugin’s built-in saved query editor. To add or edit queries, press the “Manage” button, a new panel will be opened:
(this is a partial view of the query edit form)
You can set any of the available fields in any combination to act as filters. To save the query, just press the save button on the top menu of the panel and the saved query will be ready to be used on the corresponding tracker panel.
The tracker item panel:
You can both edit / add tracker items to the project’s trackers. The following screen shows a tracker item edit window. It provides the same functionality found on GForge’s AS web interface. All the default and user created fields for each tracker are present. The “Edit” tab contains the basic tracker item fields, such as summary, description, assignees, dates, priorities and any custom or user created field.
The rest of the tabs provide additional functions, such as:
- Messages: allows to post follow-ups to the tracker item
- Attachments: upload file attachments to the tracker item
- Change Log: shows the list of changes on the tracker item (displays date of change, field changed and old/new values)
- Commits: shows the commits made against this tracker item
- Dependencies: shows what tracker items the current tracker item is dependent on. Allows to add dependencies.
- Duplicates: shows duplicates of the current tracker items. Allows to add new duplicates.
- Associations: shows associated elements to this tracker item. Elements that can be associated are: tracker items, documents, package releases and wiki pages. Allows to add new associations.
- Time Tracking: shows time entries made on this tracker item, allows to set new time entries.
- Tags: shows the current tags assigned to the tracker item, allows to set new tags.
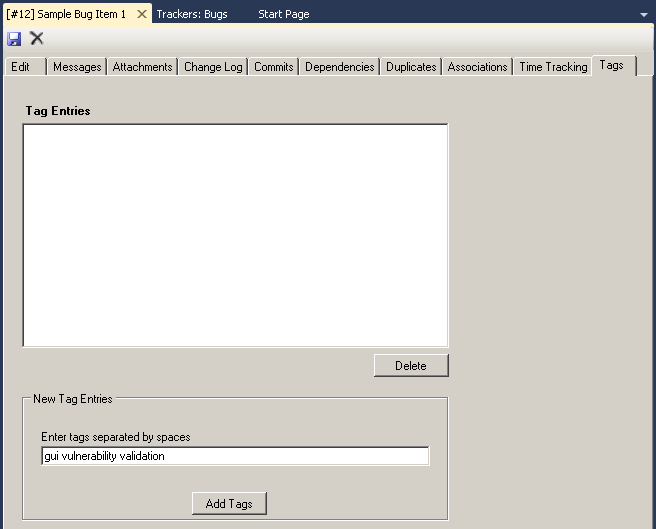
The tags tab:
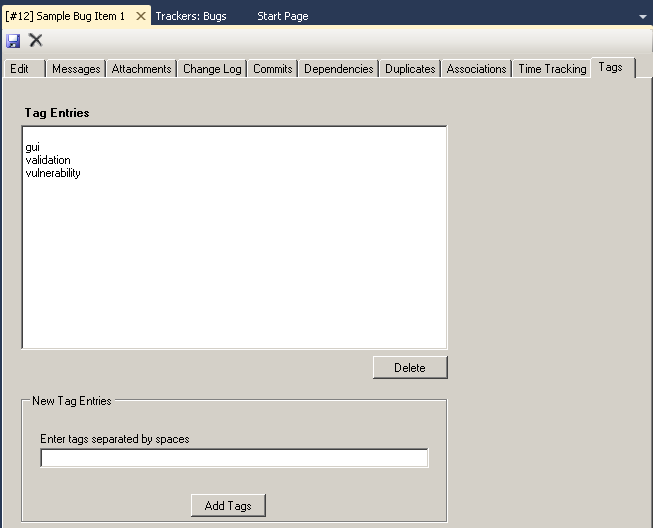
We will briefly discuss the tags tab in the tracker item panel. This is a new feature in GForge AS 5.7. It lets you assign tags to items (tracker items, documents, form messages, etc). Each tag is a single word (no spaces), and they can be searched by GForge’s search engine. This feature lets you easily retrieve related items with more precision.
Let’s see a simple example: suppose we have a tracker item in the “Bugs” tracker. The item describes a potential bug informed by a user, that imposes a vulnerability due to a bad validation on the user interface . We could assign the following tags to it: “gui”,”validation”, “vulnerability”. If you wanted to, for instance, know which of the bugs refer to vulnerabilities related to the user interface, you could do a tags search on GForge with “gui” + “vulnerability”, or “validation” +”gui”, etc. Of course, for this to be useful there must be some consensus among the developers about how to name tags.
The following screenshots shows the tags form, we are about to insert the tags of the example. Tags must be separated by a space:
After press pressing “Add Tags”:
Document Manager:
The document manager features of GForge’s VS 2010 plugin let you access the project’s document repository on the GForge server. It provides the full power of GForge’s document management capabilities, such as:
- Document versioning: you can create new document versions, download specific versions, remove versions.
- Associate a document with tracker items, other documents, FRS releases, wiki pages.
- Block / unblock access to a document
Adding / deleting folders:
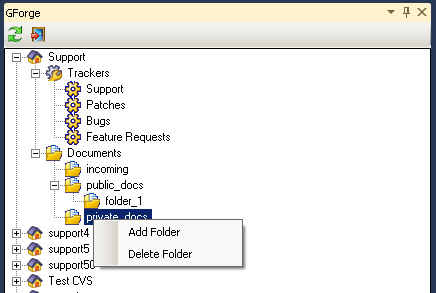
You can create a new folder anywhere on the folder tree structure:
Right click on the parent folder:
Then enter the folder name and the folder tree will by synchronized with the server:
Adding a new document:
Double click on the folder name where you want to add the new document, a new panel opens, showing the folder contents:
The toolbar shows four icons:
refresh the panel. It synchronizes the panel contents with the server.

new document. Opens the new document panel.
delete a document. Select a document and click this icon for deletion.
download document. Select a document and click this icon, it downloads the latest document version.
Editing an existing document:
From the folder panel shown in the previous screenshot, we select the document to edit double clicking on the corresponding row. The document panels open:
We then go to the “Versions” tab:
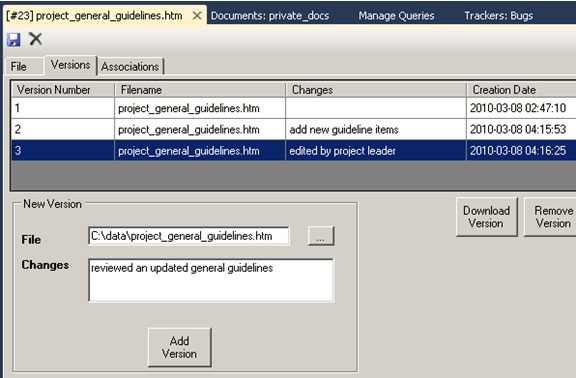
The “Versions” tab shows the all the stored document versions, with their date, changes log, etc. To create a new version, we first download the latest version (or the version we want to be our starting point for editing), by selecting the version and then clicking “Download Version”.
After we have edited the file, we upload it back:
Uploading a new version is as simple as selecting the file from the filesystem, entering the changes description and clicking “Add Version”.
Associating the document with a Tracker Item:
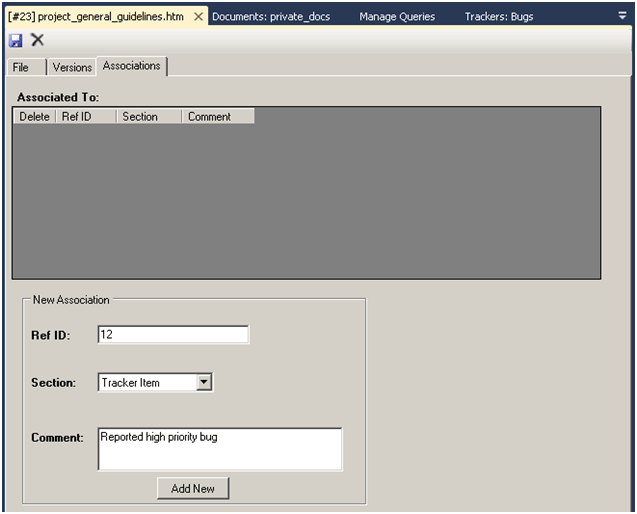
As we mentioned before, you can associate a document with other items within the project. In this example we will associate our document with a tracker item from the “Bugs” tracker.
Let’s suppose we want to associate the “Sample Bug Item 1” tracker item to our document, so we go to the “Associations” tab in the document panel and enter the “Ref ID” field, which is the tracker item’s ID (shown on the tracker items panel), then we select “Tracker Item” as section and we can enter a comment, to describe the purpose of the association. Finally, we click “Add New” to save it.
Important: the procedure we did for adding the association, only saves it locally on the plugin. To commit the changes to the GForge server we must press the “save” icon on the top-left side of the panel.
Project settings:
This is another new feature present in GForge 5.7 that was added to the new releases of the Visual Studio plugin (2005, 2008 and 2010 versions). The project administrator can enable / disable tabs for:
- Enable/disable association tab both on individual tracker an in document manager
- Enable/disable tags tab both on individual tracker an in document manager
- Enable/disable dependencies tab on individual tracker
- Enable/disable duplicates tab on individual tracker
- Enable/disable time tracking tab on individual tracker
You can only change those settings from the GForge web interface, and only if you are a project or site administrator. When you log in to the plugin, the settings are retrieved from the server and applied.

